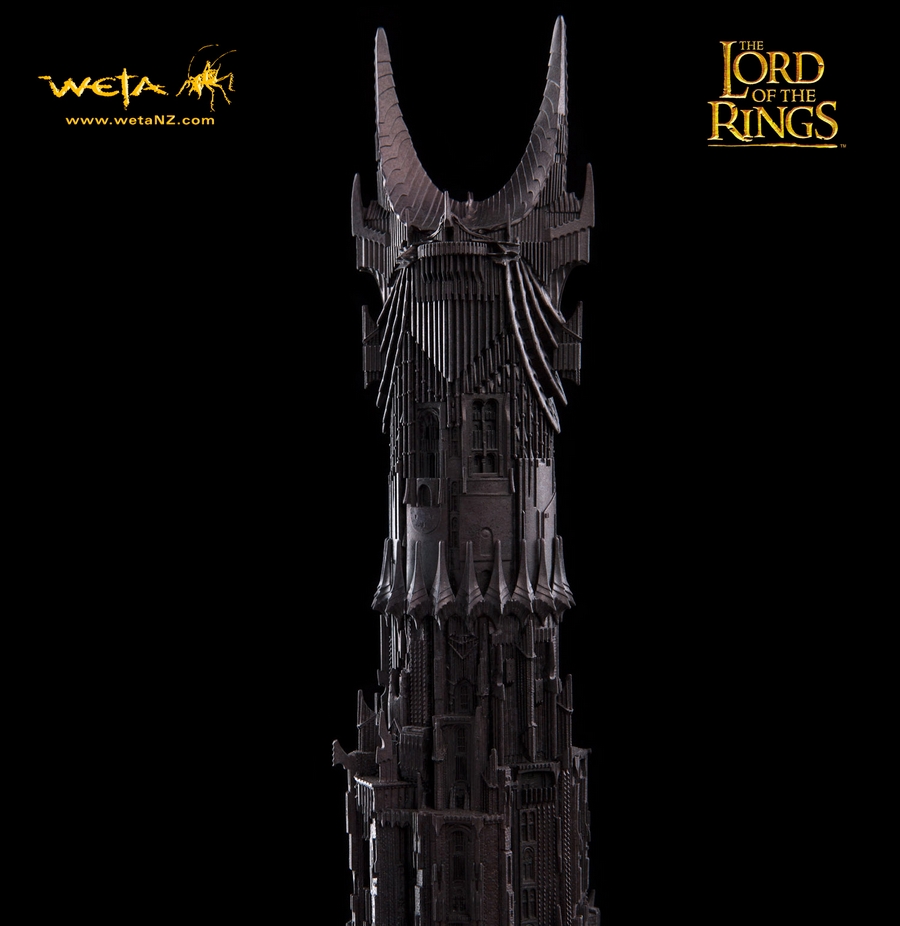
BARAD-DUR
Miniature Environment



Informations
Type : Miniature environment
Échelle : non indiquée
Sculpteur : ?
Dimensions : 53 cm x 46 cm x 31 cm
Poids : 10 kg
Tirage : 1000 ex.
Prix : 699$
Photos HD
http://www.marvelscustoms.com/freak/albums/WETA/barad-dur_preco_1.jpg
http://www.marvelscustoms.com/freak/albums/WETA/barad-dur_preco_2_HD.jpg
http://www.marvelscustoms.com/freak/albums/WETA/barad-dur_preco_3_HD.jpg
http://www.marvelscustoms.com/freak/albums/WETA/barad-dur_preco_4_HD.jpg
http://www.marvelscustoms.com/freak/albums/WETA/barad-dur_preco_5_HD.jpg
http://www.marvelscustoms.com/freak/albums/WETA/barad-dur_preco_6_HD.jpg
http://www.marvelscustoms.com/freak/albums/WETA/barad-dur_preco_7_HD.jpg
http://www.marvelscustoms.com/freak/albums/WETA/barad-dur_preco_8_HD.jpg
http://www.marvelscustoms.com/freak/albums/WETA/barad-dur_preco_9_HD.jpg
Photos de l'exemplaire présenté à la Cave Weta


Photos du Comicon 2012
Photos de odb

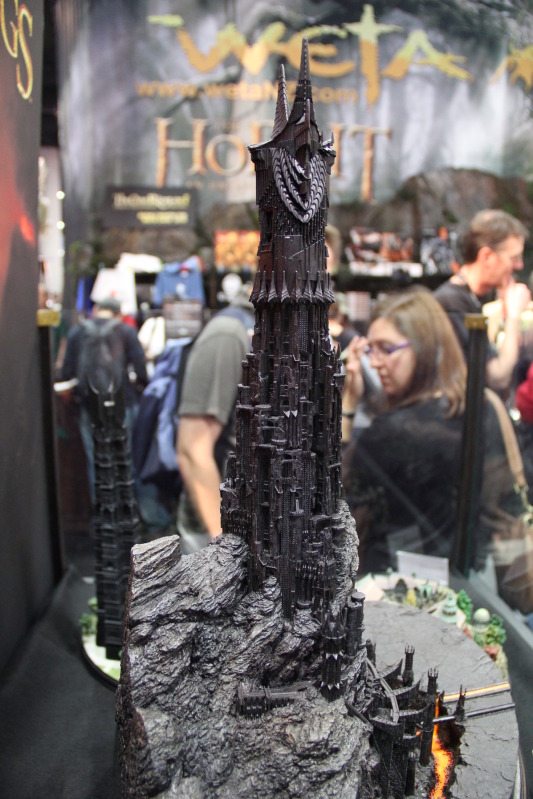


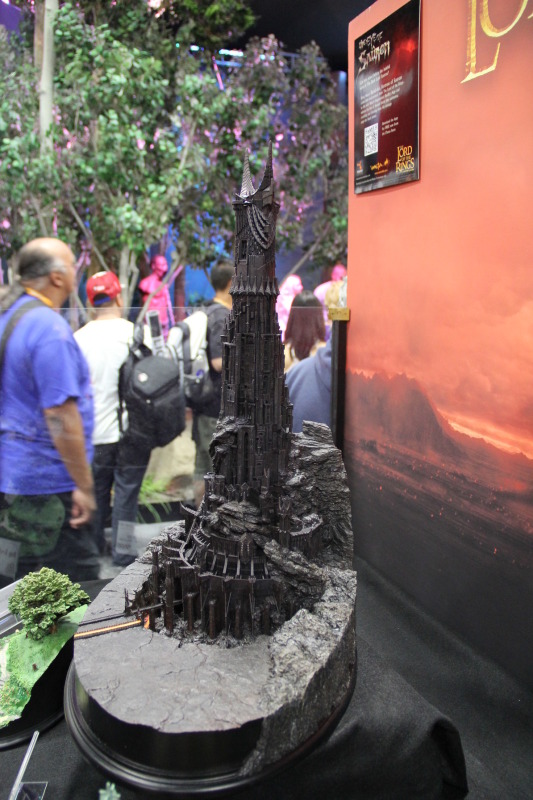


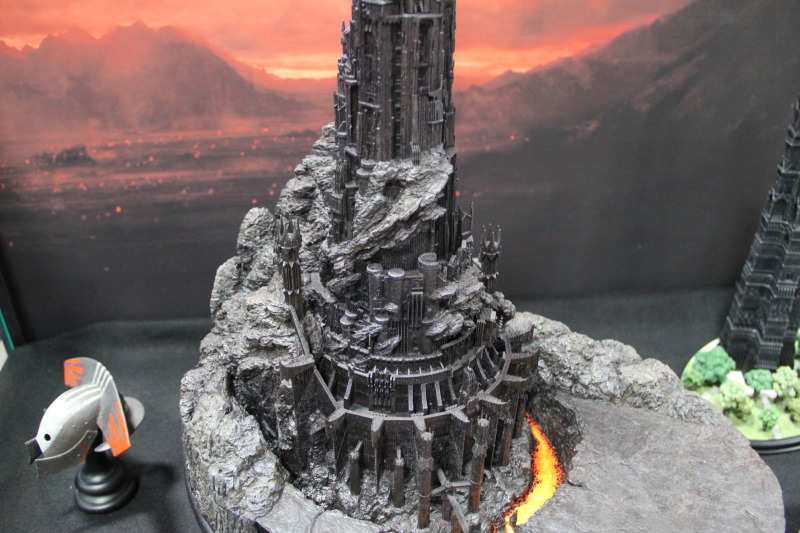

Miniature Environment


Informations
Type : Miniature environment
Échelle : non indiquée
Sculpteur : ?
Dimensions : 53 cm x 46 cm x 31 cm
Poids : 10 kg
Tirage : 1000 ex.
Prix : 699$
Photos HD
http://www.marvelscustoms.com/freak/albums/WETA/barad-dur_preco_1.jpg
http://www.marvelscustoms.com/freak/albums/WETA/barad-dur_preco_2_HD.jpg
http://www.marvelscustoms.com/freak/albums/WETA/barad-dur_preco_3_HD.jpg
http://www.marvelscustoms.com/freak/albums/WETA/barad-dur_preco_4_HD.jpg
http://www.marvelscustoms.com/freak/albums/WETA/barad-dur_preco_5_HD.jpg
http://www.marvelscustoms.com/freak/albums/WETA/barad-dur_preco_6_HD.jpg
http://www.marvelscustoms.com/freak/albums/WETA/barad-dur_preco_7_HD.jpg
http://www.marvelscustoms.com/freak/albums/WETA/barad-dur_preco_8_HD.jpg
http://www.marvelscustoms.com/freak/albums/WETA/barad-dur_preco_9_HD.jpg
Photos de l'exemplaire présenté à la Cave Weta


- Spoiler:
- Weta Senior model maker David Tremont tells us, in the first of a
series of updates, about the epic undertaking of our new collectible - Barad-dûr - Fortress of Sauron
August 2011
"...you look like a climber staring up at Everest with a mix of fear and trepidation." (Anna Abernethy - Weta)
I was standing, hands in pocket, looking up at the original 7.5 meter studio model towering over me. Lost in thought with ways of doing this, I must have looked a little dazed as I came out of my reverie to turn and see Anna behind me.
It is too distracting to continue focusing on how difficult it is going to be. So something has to start, and that as always, is repeated detail that can be moulded. First up is a bit of a test bed to work out a style and level of detail.
These images (on the right hand side) show the first detail section to be built (flying buttress at base of tower) and how small some of it is. The first viewing of the model was very daunting… the 'how the hell am I going to do this' moment came over me. The thing is huge and very complex, but the more I get into it and understand / workout how to do it and actually make a start producing pieces, the more ‘easy’ it seems.
This is not to say that the job is easy.... far from it, but I feel that I am figuring it out, getting more comfortable and confident with it. Now, when I walk past the miniature, it does not seem so big.... it hasn't shrunk or anything, but has become more attainable as a model making exercise.
The original planning was based on pictures (before the studio model arrived), and one of the things that was not completely evident to me, was the amount of brick work. It is visible, but the entire studio miniature is covered in it and I did not realise this at the time....
Arrgh! There is no way I am going to have the time to do tiny brick work like Rivendell. There is simply way too much of it, so another way has to be found. I did try a section on the first piece (buttress). That took a long time and confirmed that doing it all that way was not going to be possible. The brickwork, on the studio miniature was done by pressing a square tool into foam - some of the patterns were made out of dense foam - so I would try this method on a flat sheet... but into what medium? Foam is no good as I have to make very small complex pieces and they have to be made out of rigid material. So perhaps a material that can be embossed and glued to the detail piece? As it happens, I have a roll of aluminium tape that is very thin, has a strong adhesive backing and is very easily marked. I made tiny square tools that can be pressed into the foil to leave a brick shaped print.
The scale had to be cheated a little because 'true scale' would be much less than the thickness of the paint that would go on top of it. So, a balance was made to give the impression without overdoing it. Standing back from it, it had the exact texture feel that matched the studio model.
Barad-dur (studio model) was made up of many repeated detail panels and it will be the same for this project; in fact, over a hundred different tiny panels are to be built and close to a thousand cast.... a very daunting task when looking at it from the perspective of the start of this job. So each piece, no matter how small is treated like an individual job. This helps me focus on one task at a time avoids me getting consumed by the vastness. Each panel starts the same way...
The first part of the process is to take several images, of the detail, which I then print out on a large piece of paper. I leave gaps between the images so notes and measurements can be written down and then the dimensions the collectible will be at. Even with complete access to the original, it is still a great deal easier to do this. The most important measurements are the overall ones; width, height and depth. Everything has to happen inside these so that the finished piece will fit against the next, and the next and so on for hundreds of them. Small increments out adds up to big ones when dealing with so many components. The next part is done more in my head, and can be mistaken for me staring blankly into space. This is working out what we would call ‘mechanical requirements’ and is what the factory needs, and is limited to, for their production. At all times it has to be remembered that this is a pattern being built for production, and their needs are top of the list... it is not an exercise in ‘how clever am I!’. Some of the detail would be smaller than the thickness of a piece of paper and would not reproduce, while others would break off in the packaging because they are too flimsy or their moulds would be far too complex. We have to have an understanding of what will and won’t work when we build these things, but always push the boundaries. The trick is working out what to leave off or alter while retaining the essence of the original. With fine fins it may be simply lowering the height to allow the correct volume of detail while keeping it strong enough to pull out of a mould and handle. How many sections the patterns have to be in is also an important part of the process, and sometimes just having a section of detail as a separate piece would solve many problems. The end result is a resin copy out of a silicone mould... things shrink and moulds are flexible. This allows low production run collectibles to be affordable, and going to this level of adjustment is the cost to achieve this.
Barad-dûr - Fortress of Sauron will be unveiled for the first time at Weta's booth #3513B at San Diego Comic Con on 11 July
Photos du Comicon 2012
Photos de odb


Dernière édition par frankythegoon le Mar 11 Sep 2012, 20:04, édité 9 fois


